


How to create a free online test
By Ian, FlexiQuiz.
4 minute read.

Are you looking for a quick and easy way to create tests, quizzes, courses, or exams for free?
Whether you're making a zoom trivia quiz for friends or formal tests for students, this guide shows you how to make an online test that saves you time and costs nothing.
Eight steps to making free online tests
Step 1: Find the best online test maker.
A vast choice of online test makers offer various free features with some limitations.
The big question is, how do you know which platform is the best for you?
To start, you'll need to consider what type of quiz you're creating, who your target audience is, and what you want to achieve.
I'd recommend looking for a test-taker that can offer these free features at a minimum.
- An intuitive user interface, so you don't waste time trying to work out how to add a question.
- The ability to create custom welcome, thank you, and registration pages to engage and inform test-takers.
- A choice of sharing options with the ability to collect participant data if required.
- The chance to share results, grades, and feedback with test-takers.
- Timers to set limits by page or the whole quiz.
- Question and answer randomization - a key feature if you're creating formal exams.
- No credit card guarantee, no time limits on the free plan.
- Access to new features as technology develops.
- Finally, an option to access more premium features by upgrading at a fair price.
The FlexiQuiz free plan offers all of the above features and more!
Once you've selected your favorite test maker and drafted your questions, you can start building your quiz.
Step 2: Name your online test.
Next, enter a title for your quiz.
The name typically reflects the subject but can be formal, imaginative, or crazy.
However, there's no need to spend hours thinking of a smart title as you can easily change it at a later time.
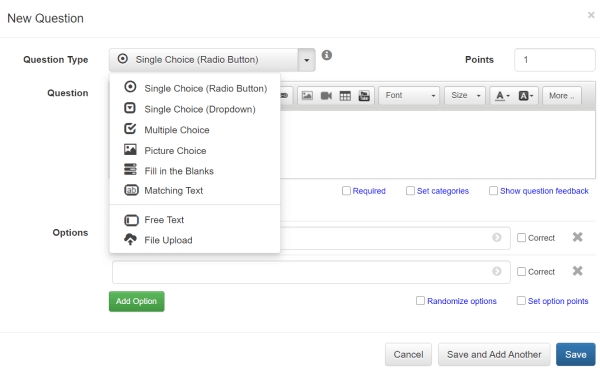
Step 3: Enter your questions.
Next, type your questions and any answer options onto the test maker platform. The test-maker platform will provide several formats so that you can present the question suitably.
With FlexiQuiz, you can choose:
- Picture choice
- Single choice (drop-down)
- Single choice (radio button)
- Multiple choice (checkboxes)
- Free-format
- Fill in the blanks
- Matching text
These versatile question types that can be applied to all sorts of questions such as matching, spelling tests, yes or no, true or false, and many more.
Step 4: Set-up the scoring.
One of the best things about an online quiz maker is it saves you time by allowing the system to score and grade your quizzes. You just need to tell the system how you'd like the scoring to work.
You typically need to provide the following information:
- The correct answer, so the system knows how to award the points.
- Choose how many points you'd like to add or deduct for each question.
- Set some grades based on the total score.
Step 5: Format the questions
Decide how you'd like the questions presented to test-takers with a choice of formatting options.
These are a few examples of formatting options:
- Choose your font, size, and position on the page.
- Randomize answer options.
- Set the question as required so test-takers can't submit their quiz until they've responded to the questions.
- Add some feedback that the system can show to test takers during or after the quiz.
Step 6: Configure your quiz.
Once you've set the questions, you can configure the rules for the whole quiz.
Configuring a quiz may sound a little complicated, but it's effortless with the right test-maker. It's just a case of deciding what you'd like added to your quiz - you don't need to be a coding expert!
Some popular options to consider are:
- Adding a progress bar that lets people track how many questions they've responded to.
- Setting a grade that indicates the test-takers level of accomplishment. This can be as simple as a letter, number, or statement.
- Shuffling the order of the questions every time the quiz is started.
- Adding some time limits.
- Setting a maximum quiz attempts.
Publish and share the test.
Once you're ready to share your quiz, you can choose the best way to distribute it.
Some key considerations are:
- Quizzes must be easily accessible for all test-takers using any device, including mobile.
- Do you want the quiz kept private and shared with select people only?
- Do you want to capture data?
- Do you need to know who gave what answer?
There are various customizable ways to share your quizzes with online and offline distribution solutions.
With FlexiQuiz, you can share your test with a quiz link added to an email, your website, or social media pages.
You canprint outand share a copy of your test.
You can also create a Respondent account that enables test-takers to securely log-in with a unique username and password.
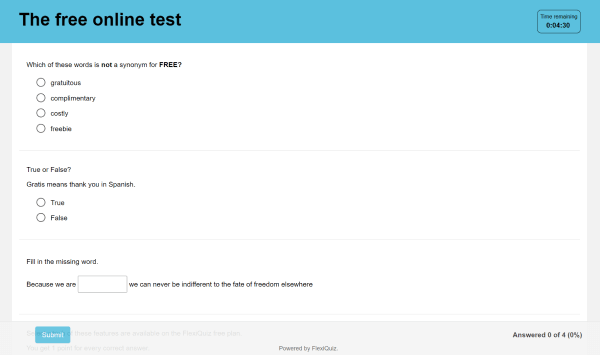
This image shows how the test can look to test-takers.
Analyze results.
Once you've shared the test, the responses will start being submitted.
An online test maker saves you time by marking and scoring the quizzes so you don't need to decipher bad handwriting or check which boxes people have ticked. Sit back, relax with a cup of coffee or even a cheeky G&T.
Depending on how you've configured the system, test takers can be told their score straight away, or you can share at a later time.
With FlexiQuiz, all of your quiz results are saved on a single dashboard for you to view and analyze. Please note that most test-takers have a limit on the number of responses and FlexiQuiz allows you to collect up to 20 responses on an unlimited number of quizzes.
Results can be downloaded in an excel file for detailed analysis or easy sharing.
This is an example of a quiz created on the free plan take test
I hope this helps you create your first online quiz.
Happy quiz making
Back