


Sharing detailed feedback based on grades
Effective feedback can help learners to develop by being able to understand why their responses were right or wrong. Learners can identify the areas they need to focus on for future development.
FlexiQuiz allows you to share feedback either for each question or based on the respondent's grade.
You can add images, video, audio, documents or text in any language to deliver feedback in a relevant and engaging way.
Feedback based on the respondent's grade works well for quizzes or personality tests.
Here's how you can share detailed feedback based on the respondent's grade at the end of the quiz.
How to share grade-based feedback
Create a scored quiz
To start, make a quiz that respondents will complete and then be given feedback.
- Create your scored quiz in the usual way.
- You can score your questions per answer option or award points for getting the whole question right.
- Choose if you want to show a results page or you can direct respondents straight to their feedback. To customize or remove the results page, go to Configure and select Results from the left-hand menu.
- Open your quiz by going to the Publish tab and press Open Quiz.
Build your feedback templates
Next, add your custom feedback that you would like to share.
- From your main dashboard, press Create Quiz.
- A pop-up will appear - choose the Classic Quiz type.
- Now add a title for your feedback and press Create quiz.
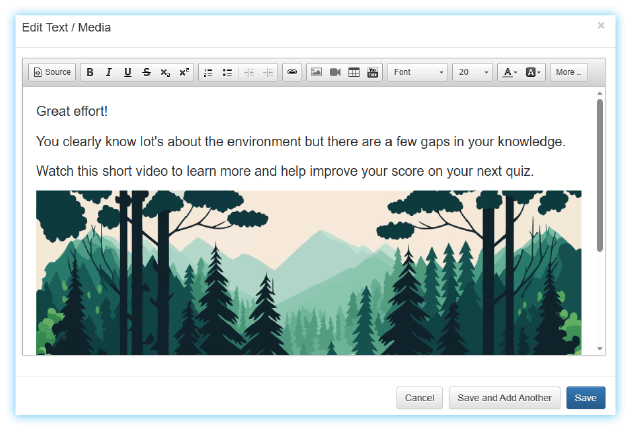
- To add a content page for your feedback, press the blue Add Item button and choose Text/Media from the drop-down menu.
-
You can add your feedback to the page. Include videos, images, gifs, hyperlinks and audio to deliver the feedback in an engaging and memorable way for respondents.
- As this is not a quiz, you will probably want to remove the results page. Go to the Configure screen and select Results from the left-hand menu. Untick the box Show results page.
- Style and configure the feedback template with your logos, colors and fonts.
- Finally, it would be best if you open the feedback. Go to the Publish tab and press Publish Quiz.
- Repeat steps 1 to 8 to build more feedback templates.
Add quiz redirects
Now define what feedback is shown based on how many points the respondent gets.
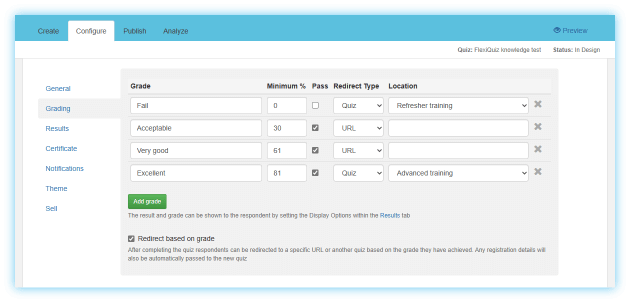
- Return to your primary scored quiz. Go to the Configure screen and select Grading from the left-hand menu.
- Tick the box Redirect based on grade. Redirect type and location will now appear in the table above.
-
Follow these steps to complete the table.
Grade: Enter some short text which will appear on the respondent's results screen.
Minimum %: Enter the minimum percentage of points required to map to the feedback.
Redirect type: Select Quiz from the drop-down menu.
Location: Choose your feedback from the list of quizzes available on your account.
-
To add more grading options, press the Add grade button.
Preview your quiz
Finally, we recommend that you preview the quiz to check how it looks to respondents.
Advanced features
- Customize the text on all messaging and buttons.
- Send email notifications to respondents with a summary of their feedback.
- Choose how many times people can view the feedback.
Relevant help guides:
How to customize the results screen
How to share feedback for each question
Back