


Awarding custom-branded certificates to your learners
Recognize and reward your learner's achievements with a custom certificate that reflects the test subject or your organization's branding.
With FlexiQuiz quiz maker, you can upload certificates with your branded design that we will automatically share with learners when they pass your test. Certificates can include fixed and dynamic data fields such as a student's name, completion date, grade, expiry date, or a unique certificate number.
This guide shows you how to create and award custom-branded certificates.
How to create your custom certificate
To start, you need to create a template for the certificate and leave blank spaces where you want FlexiQuiz to add the text.
Certificate design guidelines
- You can create a certificate in a Portrait or Landscape design.
- The image must be the following size: 1600px by 1130px.
- You can create a template using Word or PowerPoint. In addition, several online companies, such as Canva or Design Wizard, can help you create a basic email template.
- Leave a blank space on the template where you want the FlexiQuiz system to add dynamic or fixed text.
- Here are some certificate templates you can customize with your branding.
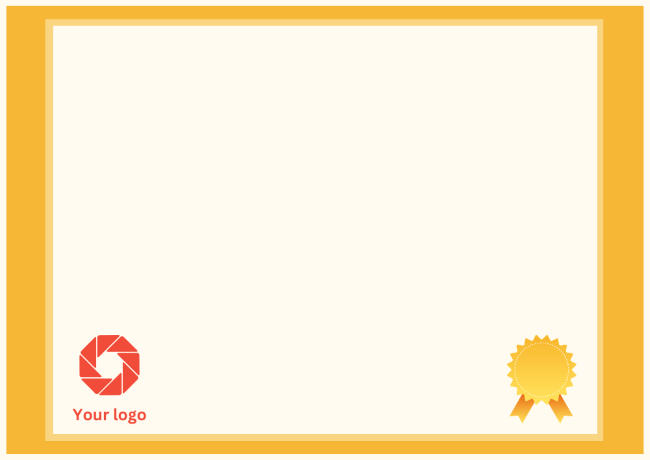
A custom certificate template ready to upload can look like this image below.
How to upload your certificate template
Once you have your branded certificate template, you can upload it to the relevant quiz and customize the text.
- Select the quiz where you want to add the certificate.
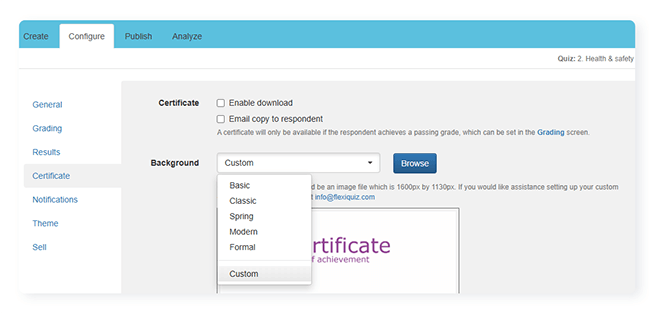
- On the Configure screen, select Certificate from the left-hand menu.
- Scroll down to Background and select Custom from the drop-down menu.
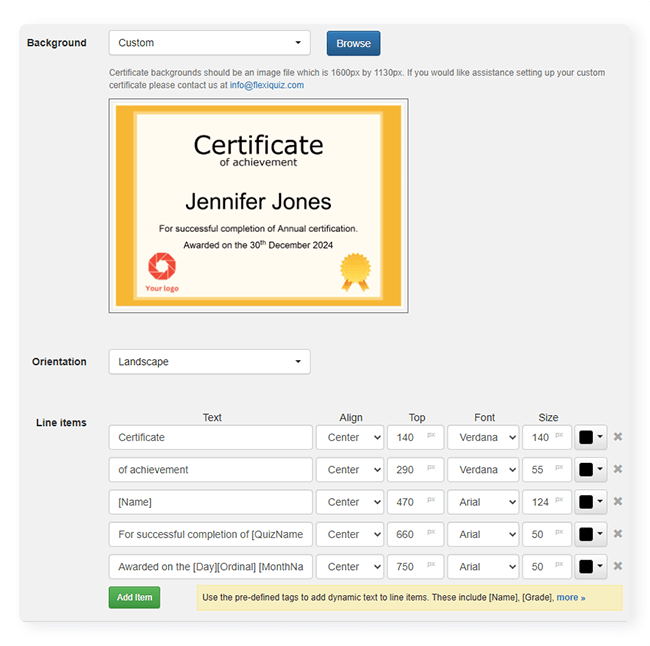
- Now click the blue Browse button and select the image file you want to upload in JPEG, PNG, BMP, or GIF format. After uploading, your certificate template will appear in the image box.
- Scroll down to Orientation and pick Landscape or Portrait from the drop-down menu.
- Then, go to the Line items section to configure the text on the certificate. You can remove the existing text, add your own, and change colors and position.
How to customize the text on your certificate
Certificates can include fixed or dynamic text.
Fixed text is the same for all learners.
Dynamic text automatically changes based on the learner's data, such as the learner's name, test results, date of exam, grade, expiry date, and more. Dynamic text is in square or curly brackets.
- To delete any existing line item, press the X on the right-hand side of each line.
- To add new line items, click Add item.
- Now add your text to each line. Enter the tag for the dynamic text in a square or curly bracket.
- To position the text, you can align to the page's left, center, or right. You can also choose how far from the top you want the text to show. In the Top column, enter the distance from the top in pixels.
- Then, choose the size and color of the text.
The certificate image will show you the layout as you edit the text.
Learn more about dynamic text
The FlexiQuiz system will automatically add the text based on the learner's data. For example, their name, the date their take the quiz or their results. You can choose what text to add and position dynamic text using tags.
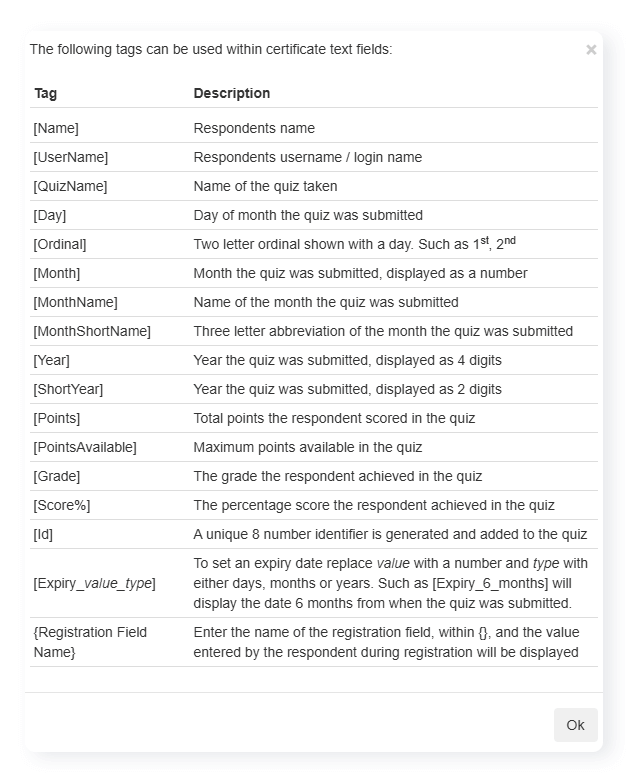
We match the data from the learner using the tag. For example, we populate the Name tag using the First name and Last name on a registration page or respondent portal user fields.
Important! If you customize the registration fields on a registration page, you must update the dynamic text tag.
How to award or share your quiz certificate
We automatically award a certificate to learners who 'pass' your quiz by sharing a PDF on the results screen or emailing.
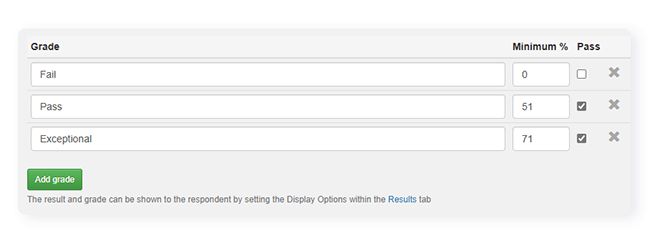
- To start, select which grades qualify for a certificate. From the Configure screen, select Grading from the left-hand menu to open the grades table.
- You can customize each grade by selecting scores, the name of the grade, and redirects.
- In the Pass column, tick each grade to which you want to award a certificate.
- To select how you want to share the certificate, return to the Certificate screen.
- To add the certificate to the results page, click Enable download. Then, customize the results page.
- To add the certificate to email notifications, tick the box, email copy to respondent. Learn more about email notifications.
Frequently Asked Questions
Can I view a copy of the certificate?
Yes, you can view a copy of the certificate on the Analyze screen.
- From the analyze screen, find the relevant user.
- Then press select action to view the drop-down menu.
- The 'certificate' option will show if the learner qualifies for a certificate on their current quiz attempt. Click certificate to download the certificate.
Why does the certificate option not appear on the analyze screen?
If the certificate option does not show, the learner does not qualify for a certificate on their current quiz attempt.
The learner may have failed all quiz attempts or passed a previous quiz attempt and qualified for a certificate. The analyze screen will only show a certificate if the learner qualifies on their current attempt.
Can I award a certificate manually if a learner fails the quiz?
Yes, you can award a certificate.
- From the analyze screen, press select action.
- Now choose edit from the drop-down menu.
- Tick the box Pass.
- Then press Save changes.
- Now refresh the analyze screen, and the certificate option will appear.
Can I copy the certificate line items to a new quiz?
YouTube video guides
Adding custom certificates to your quiz.
Relevant help guides
How to award a standard FlexiQuiz certificate
Back