


Sharing your quiz using a link
Sharing your tests or courses with a quiz URL link means that learners can access your FlexiQuiz content with a simple web address.
Whether you're sharing with students, coworkers, friends, or customers, a quiz link makes it easy for people to click, participate, and submit their answers from any device — no downloads or logins required.
How to generate URL for your quiz
- To start, create and configure your quiz.
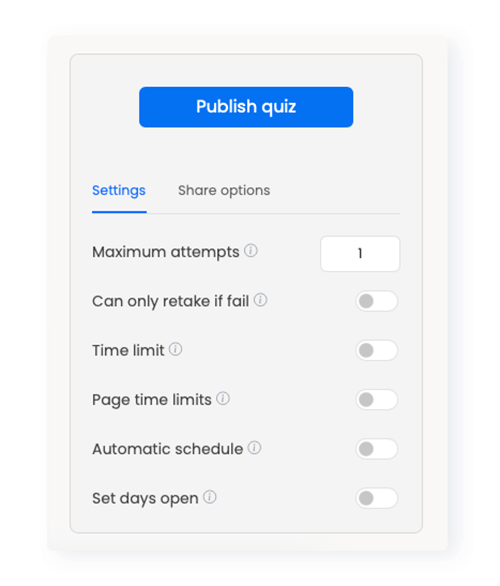
- Once you are ready to share your quiz, go to the Publish tab.
- You can choose to open your quiz immediately by clicking Publish quiz. Alternatively, you can set a schedule for when the quiz will open and close.
- Then click on the Quiz link box to view and customize the link.
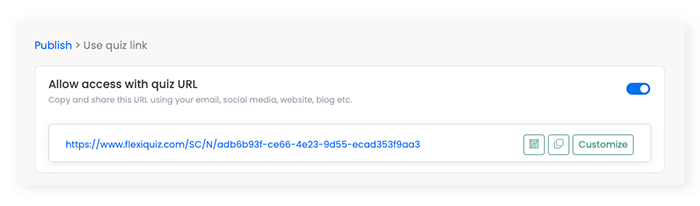
- Select the toggle Allow access with quiz URL and your link will appear.
- If you have an Essentials plan or above, you can customize the text at the end of the URL to make it more user-friendly. Click on the Customize button and enter your new text. If someone on the FlexiQuiz site currently uses the URL text, a message appears asking you to choose a new name.
- Click on the copy icon and paste the URL into your selected channels.
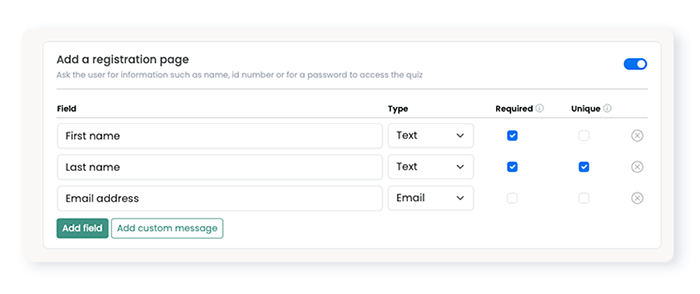
- To add a registration screen to the start of your quiz, go to the Add a registration page box and select the toggle. You have the option to customize the registration page to capture the relevant information.
Anyone can access your quiz through this link if the quiz is open.
Frequently asked questions
Can I control the number of times users access my quiz with the quiz link?
Yes, you can set the number of times learners can access your quiz using the maximum quiz attempts feature and either a unique field on the registration page or using the browser attempts tracker.
To add a unique field to your registration page:
- Go to the unique column.
- Then tick the box next to the relevant field, such as surname or ID number.
Note! The system cannot stop learners from registering multiple times with different details.
What happens if someone exits the quiz without submitting their answers? Are the learners' responses saved, and can they return to the same place?
The FlexiQuiz system automatically saves all data as a student enters their response.
If the learner leaves the quiz partway through their first attempt, you can can access a new URL that has saved their responses. To get the user's unique URL:
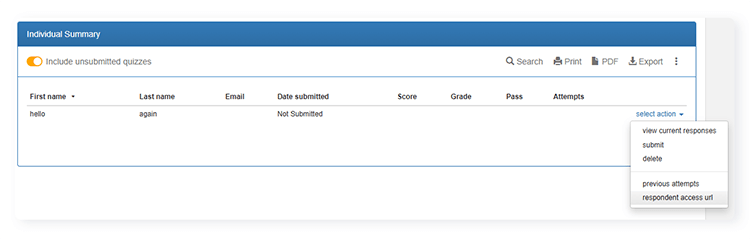
- Go to the Analyze screen and select the toggle Include unsubmitted quizzes.
- Now, locate the user and click select action.
- Choose respondent access URL from the drop-down menu.
- A window with the URL for the learner to access their unsubmitted quiz will pop up. Copy the URL and share it with your respondent.
Important! The URL is only available on the learner's first attempt if they still need to submit the quiz.
Is the response data anonymous?
You have the option to add a registration page to collect data or to keep the quiz responses anonymous.
If you want to keep the data anonymous, you can choose not to add a registration page. If you do not add a registration page, the data will remain anonymous. You will be able to view the responses, but you will not know who submitted the information.
Can I remove the FlexiQuiz name from the URL?
It is not currently possible to remove FlexiQuiz from the URL.
However, you can:
- Customize the end part of the URL to make it more user-friendly.
- Embed the quiz on your website. By embedding your quiz you can direct people to your site to take the quiz.
Can I restrict who views my quiz if I use the quiz link?
To keep your quiz private, you can add a registration page with a password or code. People can only access your test if they quote the correct code. To add a password or code:
- Add a registration page.
- Click Add field. A new field appears on your registration page.
- In the Type column, select Password from the drop-down menu.
- Now in the Required column, enter the password that you want all learners to enter.
- Click Close to update the registration page.
Relevant help guides:
Other ways to share your learning content
Back