


Respondent accounts provide a personalized portal for quiz takers to track and take quizzes or tests assigned to them. However, respondents are not able to create or share their own quizzes or tests.
Respondent accounts work well for quiz makers who want to assign regular quizzes or tests to participants and track results. For example:
- Company training & compliance courses
- Students learning & testing plans for the year
How to set up a Respondent account
You must be an Administrator or Trainer with user permissions to set up Respondent accounts
- Log into your FlexiQuiz account
- Go to dashboard
- Select Users from the header
- Click the blue Create User button
-
You will be shown the following screen:
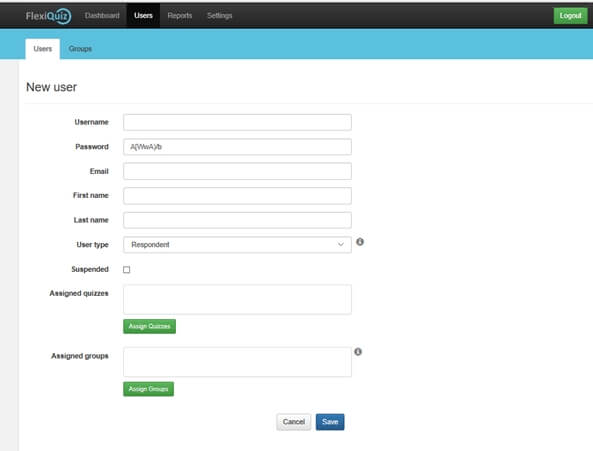
This is a list of the fields:
- Username – mandatory. Needs to be unique as the respondent will use this to access their account on FlexiQuiz.com.
- Password – mandatory. FlexiQuiz provide one that is randomly generated. However, you can change this by typing over the text. Respondents can update their password when from the settings page when they log into their account.
- Email – optional. By providing an email address, you can contact respondents directly from your FlexiQuiz account with notifications.
- First name – optional. You may choose to include this for reporting and identification requirements.
- Last name – optional.
- User type – ensure this is set to Respondent
- Assigned quizzes – optional. You can choose to assign any published quizzes to the respondent from this page or the Publish screen on your quiz. See Assigned quizzes help guide for more information.
- Assigned group. optional. You can assign the respondent to a group you have already created. See Groups help guides for more information.
Once all relevant fields are complete:
- Click the blue Save button
- The Respondent account is now live
No Respondent email address provided:
If the respondents username is not an email address or you have set email address field for the Respondent you will get a pop up with the following message:
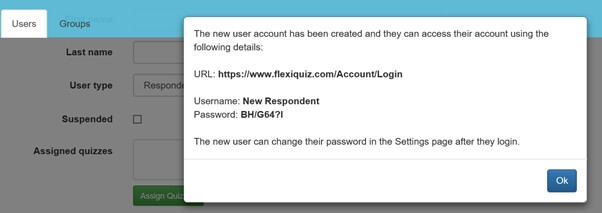
- You need to ensure Respondents are aware of the log in details, Username & Password
- Click the blue Ok button and the window will close
Respondent email address provided
If the respondents username is an email address or you have set the email address field this pop up will appear:

- Click the green arrow on the Send welcome email button to choose if you want to send a standard or personalized email to respondents
- Select send email to send the standard welcome email straight away. Or,
- Select edit email to personalize the message and email subject line
-
If you select edit email, this pop up will appear for you to edit:

- Once you've finalized the email content, click the blue Ok button
- You'll be notified that the email has been sent
Respondent account administration
This section covers how to edit or delete details for existing Respondents
This is an example of the dashboard:
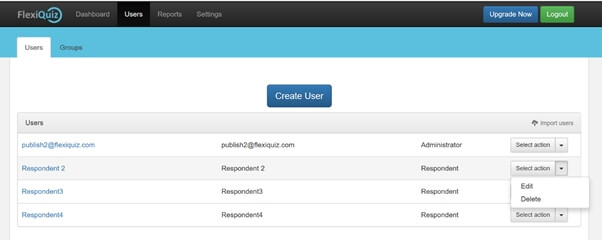
To make changes:
- Click Select action
- Select Edit
-
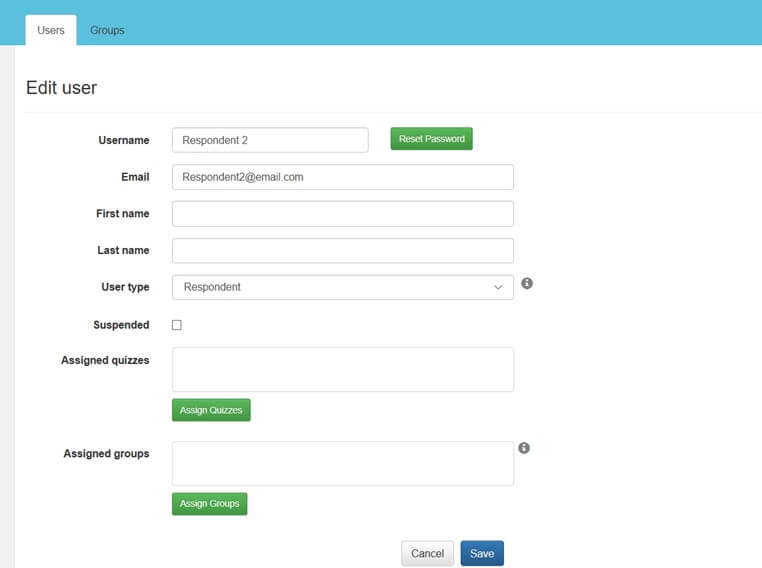
This shows the Edit Respondent user screen:
-
From this screen you can:
- Reset and send a new password to the Respondent
- Add a first name and last name
- Change the account type from Respondent to Trainer or Administrator
- Suspend the Respondent account stopping them being able to access the account
- Assign published quizzes and groups
Back